
-
Update Profile Information:
- Click on your profile picture in the top right corner.
- Select “Profile & Preferences”.

- Update your personal information, including name, job title, and profile picture.

-
Set Up Email Signature:
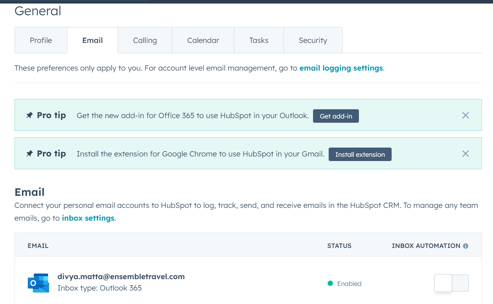
- Go to “General” settings -> Email

- Scroll down to “Email” and add your email signature by clicking edit email signature. Add your signature and hit save.


- Go to “General” settings -> Email
-
Connect your Email (Outlook)
-
Navigate to Email Integrations (Refer:
- Go to “Settings” (gear icon in the top right corner).
- Under “General”, select “Email”.

- Connect Outlook:
- Click on “Connect personal email”.

- Select “Office 365”. If you check the box for "inbox automation", these features allow HubSpot to process data in email bodies, including email signatures, and metadata of all incoming and outgoing messages in the connected inbox.

- You'll need to enter the email you want to connect with Hubspot

- Select Connect to Outlook 365 and click continue. You'll need to sign in with the mentioned email


- Hubspot will ask to add extensions. If you don't want to add any, click done. You can always add it later by visiting email page in general setting.

- Your email has been added to Hubspot.
- Click on “Connect personal email”.
-
-
Connect your Calendar (To be discuss with Thia)
- In General settings -> calendar -> connect your calendar -> choose google/outlook/exchange based on your choice -> connect your calendar -> accept terms and condition -> login to your outlook account


- Your calendar is now connected to the outlook.

- In General settings -> calendar -> connect your calendar -> choose google/outlook/exchange based on your choice -> connect your calendar -> accept terms and condition -> login to your outlook account
-
Disconnecting the Calendar
- If you no longer want to sync the calendar of your email to hubspot. You can disconnect it. Navigate to calendar in general settings -> hoover your mouse on the connected email ID and selected disconnect.

- If you no longer want to sync the calendar of your email to hubspot. You can disconnect it. Navigate to calendar in general settings -> hoover your mouse on the connected email ID and selected disconnect.
-
Integrating Microsoft Teams
-
Navigate to Integrations:
- Go to “Settings”.
- Under “Integrations”, select “Connected Apps”.

-
Connect Microsoft Teams:
- In connected apps, select "Visit App Marketplace"

- In connected apps, select "Visit App Marketplace"
-
-
-
-
- Search for “Microsoft Teams” and click “Install App”.


Follow the prompts to log in and grant HubSpot access to your Teams account. Click install app -> Sign in to your email account -> accept permissions ->
- Search for “Microsoft Teams” and click “Install App”.
-
- Limited Access: If you selected Limited install, you'll be redirected to the Microsoft Teams connected app settings and can start using the app with HubSpot. To change which Microsoft Teams user account is connected to your HubSpot user, click the User account tab, then click the Edit connected account dropdown menu.
-
*Workflows are not available if you choose the limited install.

Full Access: If you selected Full install, review the required permissions, then click Allow. You’ll be redirected to the Microsoft Teams connected app settings, where you can finish connecting teams to HubSpot and setting up your user account.
Teams add-in has been added to the account
- To select teams to sync to HubSpot, click the Connected teams tab.
- To connect a specific team to HubSpot, next to the team name, click to toggle the Connect switch on.

-
Map your HubSpot user to your Microsoft Teams User.
Please note: each user will need to complete the steps below to link their Microsoft Teams user account with their HubSpot user account.
- Go to User account -> connected accounts
- In the right panel, in the Microsoft Teams account field, enter your Microsoft Teams email address, then click Update linked account.

- A verification message will be sent to your Microsoft Teams account. Navigate to Microsoft Teams and locate the message from HubSpot, then click Verify.

- Once your account has been verified, you'll receive a welcome message from HubSpot in your Microsoft Teams account and you can start using the integration.

Add Microsoft Teams meeting links to your meetings
You can add Microsoft Teams meeting links when scheduling a meeting in the CRM or when using the meetings tool. Meeting links will be created in the default language set in your HubSpot account.
Please note: each user must map their Microsoft Teams user to HubSpot to use the meeting links functionality.
- To add a Microsoft Teams link to a meeting event you schedule from a record in the CRM, in your HubSpot account, navigate to your records.
- Contacts: In your HubSpot account, navigate to CRM > Contacts.
-
- Companies: In your HubSpot account, navigate to CRM > Companies.
- Deals: In your HubSpot account, navigate to CRM > Deals.
- Tickets: In your HubSpot account, navigate to CRM > Tickets.
- Click the name of the record.
- In the left panel, click meetings Meet. In the window that opens at the bottom of the screen, set up your meeting.
- Click Select location > Microsoft Teams.

You can also include a Microsoft Teams link on a scheduling page that you created in the meetings tool.
Please note: while it is not required to connect your Office 365 calendar to the meetings tool, it is recommended to ensure you get the most out of the Microsoft Teams integration.
- In your HubSpot account, navigate to Library > Meetings Scheduler.
- Hover over a meeting and click Edit.
- On the Overview page, click the Add videoconference link dropdown menu and select Microsoft Teams.

- Click Save.
Please note: it is not possible to update meeting links once a Microsoft Team's link has been created in HubSpot. To update the link in HubSpot, a new meeting must be created.
-
Receive HubSpot activity notifications in Microsoft Teams
Once you’ve connected the Microsoft Teams app to HubSpot and connected your user account, the following HubSpot notification types will be sent to the HubSpot bot in Microsoft Teams by default:
- Assign, Comment, Follow, Mention, Overdue, Reminder, Reply, Submission & View (i.e. document view). For example, see the screenshot below:

Please note:
- After you connect one of your teams to HubSpot, all users who are part of the team will receive notifications in Microsoft Teams.
- Notifications may be delayed by up to 5 minutes.
Turn Off All Notifications/Notification type:
To turn off all notifications, a notification type, or specific notifications from being sent to Microsoft Teams:-
-
- In your HubSpot account, click the settings settings icon in the top navigation bar.
- In the left sidebar menu, navigate to Notifications.
- Click the Other apps tab.
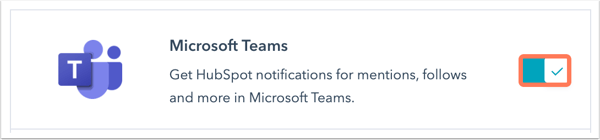
- To turn off all HubSpot notifications in Microsoft Teams, click to toggle the Microsoft Teams switch off.
- To turn off specific notification types, in the What you get notified about section, click to expand the notification topic and clear the checkboxes next to the notifications you don't want to receive.
-
-
Setting Up HubSpot Add-ins
- Install HubSpot Sales Add-in for Outlook
- Open Outlook. Click apps -> add apps


- Search for HubSpot, then click on HubSpot Sales and install

- Open Outlook. Click apps -> add apps
- Install HubSpot Extension for Browser:
- Open your browser (Chrome, Firefox, etc.).
- Go to the extension store and search for “HubSpot Sales”.


- Click “Add to chrome” and follow the prompts to install it. Click "Add extension"


- You can go to settings -> extension -> manage extension to check if Hubspot sales have been added as an extension.

- Install HubSpot Sales Add-in for Outlook
-
Enabling Two-Factor Authentication (2FA)
-
Navigate to Security Settings:
- Go to “Settings” -> select “Security”.

- Go to “Settings” -> select “Security”.
-
Enable 2FA:
- Click on “Set up two-factor authentication”.

- Choose your authentication method (e.g., SMS, Authenticator App).
- Follow the prompts to complete the setup. Use this link for reference: https://knowledge.hubspot.com/account-security/set-up-two-factor-authentication-for-your-hubspot-login
-
Setting up a SandBox:
- Step 1: Navigate to your HubSpot account settings.
- Step 2: Under the "Account Setup" section, look for the "Sandbox" option.
- Step 3: Follow the prompts to set up your sandbox. This will create a duplicate environment of your existing HubSpot account.